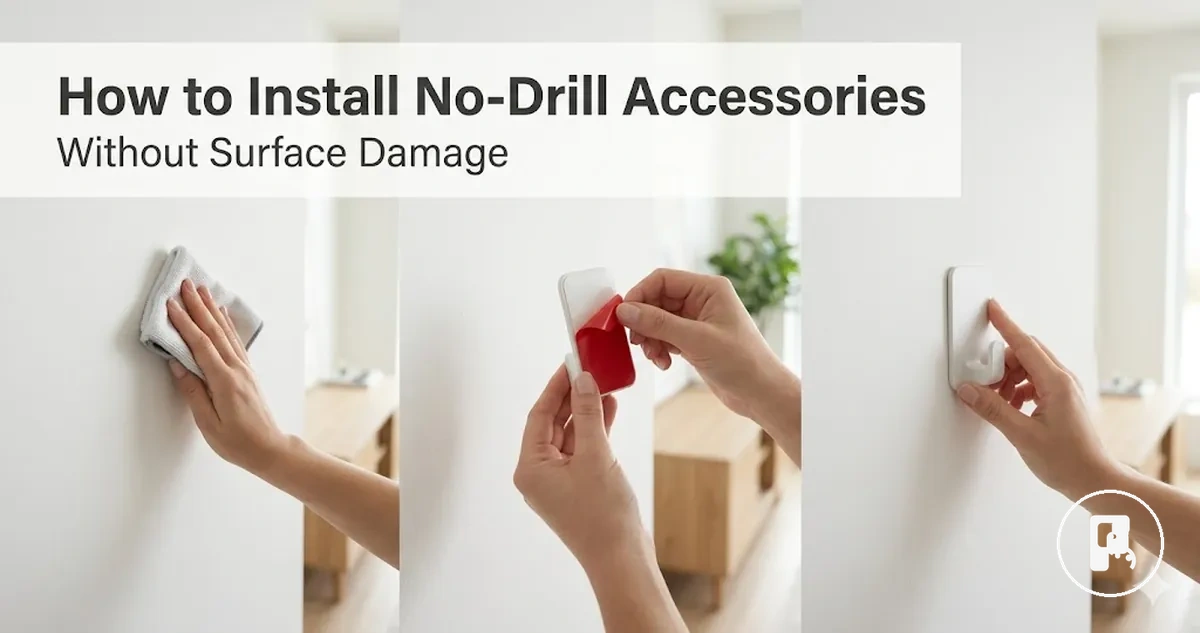
No-Drill Home Accessory Installation Without Surface Damage
No-Drill Home Accessory Installation Without Surface Damage starts with matching the mounting method, surface fit, pressure application, cure time, and load limit rather than relying only on drilling absence. Safe installation depends on how adhesive pads, suction accessories, removable strips, or a mounting kit interact with the surface condition and expected load. If any of these elements are misaligned, weak hold or surface damage may occur during use, so each factor must be evaluated before contact.
No-drill home accessories installation refers to the process of fixing functional items to a surface using drill-free systems designed to reduce surface impact while still requiring correct handling conditions. This includes adhesive mounting, suction-based contact, and removable strip systems that depend on pressure, seal quality, and curing behavior. The category of no-drill home accessories is defined by these mounting approaches and their dependency on surface compatibility rather than mechanical anchoring. The process typically moves from understanding the mounting path to preparing the surface and evaluating load conditions before any installation begins.
Most installation failures occur when surface fit is ignored, early load is applied, or the wrong mounting method is chosen for the surface type. Poor alignment between adhesive pads, suction accessories, or mounting kits and the actual surface condition can reduce holding performance and increase surface risk. A stable installation outcome depends on checking surface suitability, selecting the correct mounting method, and respecting cure time and load limit before regular use.
Confirm surface fit and load limits before installation
Surface fit and load limits must be checked before installation because mounting safety depends on matching surface condition, mounting method, and expected weight. If these factors are unclear, installation suitability becomes uncertain and should be reassessed before proceeding with contact.
Surface material, finish, moisture exposure, texture, and expected weight influence how adhesive pad, suction cup, or removable strip performs under load limits and mounting method conditions. Confirm surface fit and load limits before installation by reviewing how each condition affects holding behavior across different mounting choices.

This structured check reduces mismatch risk between rated load and real surface condition.
Key installation checks include surface type, finish condition, texture level, moisture presence, accessory expected weight, rated load, and selected mounting method.
- Surface type compatibility for adhesive pad, suction cup, or removable strip use
- Surface finish condition including painted surface sensitivity
- Texture level affecting contact stability and adhesion
- Moisture presence in wet area or damp zones
- Accessory expected weight compared to rated load
- Mounting method suitability under current surface fit
These checks align installation planning with surface compatibility before installation and help prevent mismatch between load expectations and surface behavior before any mounting begins.
Painted surface, porous surface, wet area, and high-load conditions require stricter evaluation of surface fit and load limits before proceeding. In these cases, installation may need adjustment, method change, or postponement depending on mounting stability and expected weight behavior.
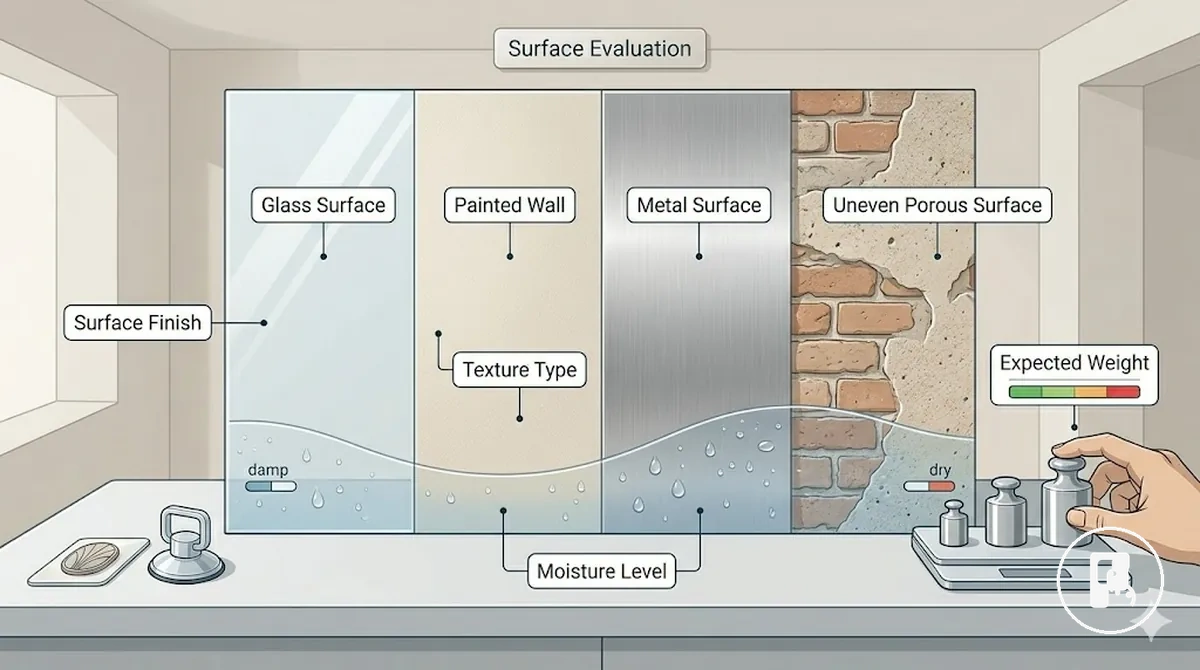
Surface finish, moisture, texture, and expected weight
Surface finish, moisture, texture, and expected weight determine whether a no-drill mounting method can maintain reliable contact with a surface. These conditions directly influence how adhesive pad, suction cup, or removable strip performs, so installation suitability changes based on their combined state rather than a single factor.
Surface finish and texture affect contact coverage, while moisture can weaken adhesion or suction sealing, and expected weight must remain aligned with the rated load of the mounting method. Surface finish, moisture, texture, and expected weight together define whether the mounting decision leans toward stable or risky installation conditions.
The table below shows how each surface factor influences installation decisions for no-drill home accessories.
| Surface factor | What to check | Safe condition | Installation risk |
|---|---|---|---|
| Surface finish | Smoothness or coating quality | Smooth, stable finish | Poor contact on uneven finish |
| Moisture | Damp or wet presence | Dry surface | Weak adhesive or suction seal |
| Texture | Surface roughness level | Low texture, flat contact | Air gaps reduce hold strength |
| Surface stability | Integrity of base material | Solid, non-flaking surface | Weak bonding on unstable areas |
| Expected weight | Load demand vs rated load | Within rated load range | Overload increases failure risk |
Smooth tile, glass, painted wall, metal, porous surface, and uneven surface may appear suitable but can still lead to poor installation outcomes if moisture, texture irregularities, or excessive expected weight reduce effective contact or exceed rated load conditions.
Adhesive, suction, removable-strip, and kit-based mounting paths
Adhesive pads, suction accessories, removable strips, and no-drill mounting kit systems should not be installed in the same way. Each mounting path changes how pressure, contact area, curing, seal behavior, and removal risk work, so the installation approach must match the mechanism rather than assuming similar handling.
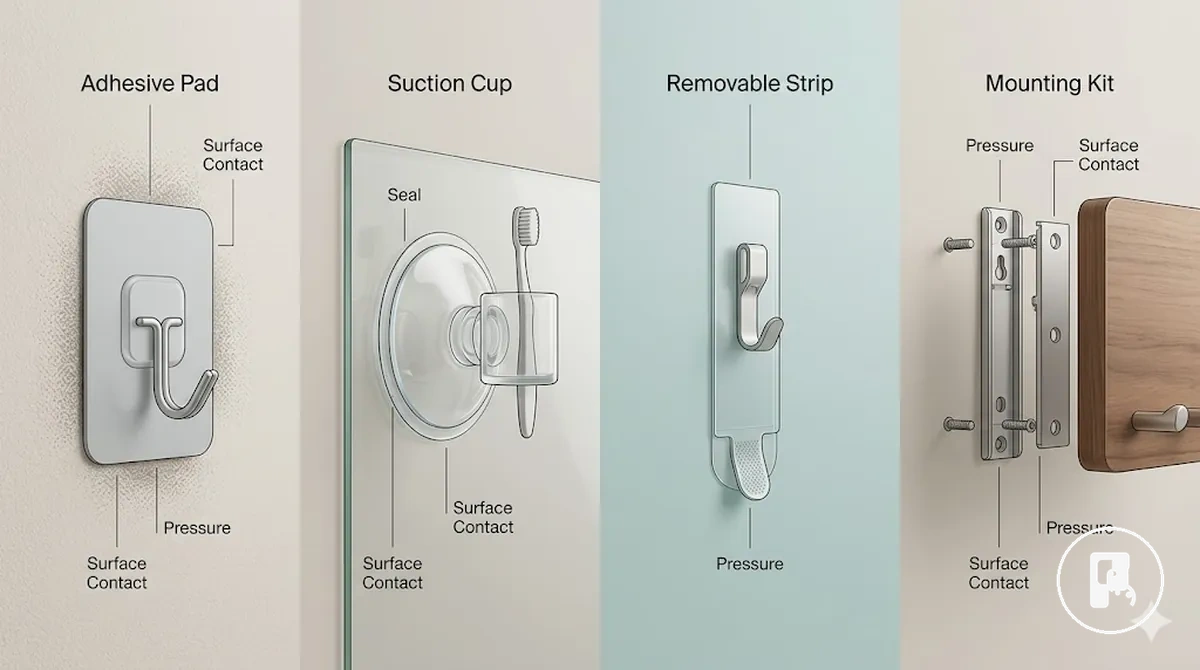
Because adhesive, suction, removable-strip, and kit-based mounting paths handle pressure, contact area, curing, and removal risk differently, each requires a distinct installation approach:
- Adhesive pads: Need a clean, dry surface and firm pressure across the contact area. They often require curing time, and weak pressure or early load can reduce bonding strength.
- Suction accessories: Depend on smooth, non-porous surfaces to form a stable seal. Air gaps or moisture can break the seal and lead to release under load.
- Removable strips: Require controlled application pressure on stable painted wall surfaces. Incorrect pull direction or premature removal increases removal risk and may affect the surface.
- No-drill mounting kit: Relies on correct alignment of kit hardware and balanced spacing. Improper fitting or uneven load distribution can reduce stability during use.
Using one mounting path as if it behaves like another can create failure conditions. For example, suction accessories on textured or porous surfaces may fail to seal, while adhesive pads used without proper curing time may lose holding strength under load.
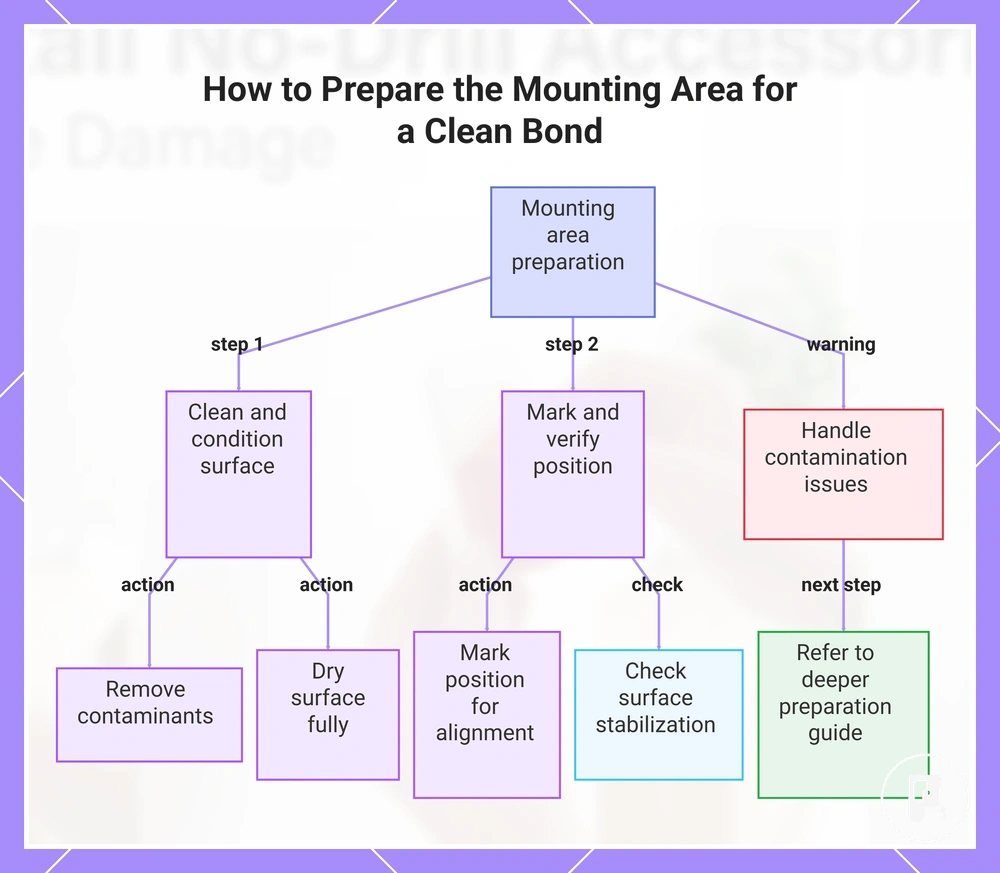
Prepare the mounting area for a clean bond
Preparing the mounting area for a clean bond ensures that adhesive pads, suction accessories, removable strips, and kit-based systems can form stable contact with the surface. A clean surface and dry surface improve adhesion quality, while dust, grease, residue, and loose material can weaken the clean bond and reduce surface stabilization during installation.
The mounting area should be cleared and conditioned so the contact area supports consistent pressure and reliable bonding behavior. Removing visible dust and residue helps maintain surface integrity, while ensuring a dry surface reduces interference with adhesion or sealing. Careful handling at this stage improves alignment accuracy before marking and positioning. The steps below explain how to prepare the mounting zone in sequence.
1. Clean the surface to remove dust and loose material that can block proper contact and weaken the clean bond formation.
2. Remove grease or residue from the mounting area to improve contact quality and support stable adhesion behavior.
3. Dry the surface fully where needed to maintain a dry surface condition that supports pressure and seal-based mounting.
4. Mark position on the mounting area to ensure accurate alignment and reduce repositioning errors during installation.
5. Check surface stabilization to confirm the area is firm and free from flaking or unstable sections before contact.
If the mounting area shows heavy contamination, unstable coating, or moisture that cannot be addressed through basic preparation, deeper preparation may be required before continuing. In such cases, refer to prepare surfaces before installing for further guidance before proceeding with the clean bond process.
This chart shows the main steps to prepare the mounting area, including cleaning, conditioning, marking, and handling contamination issues.
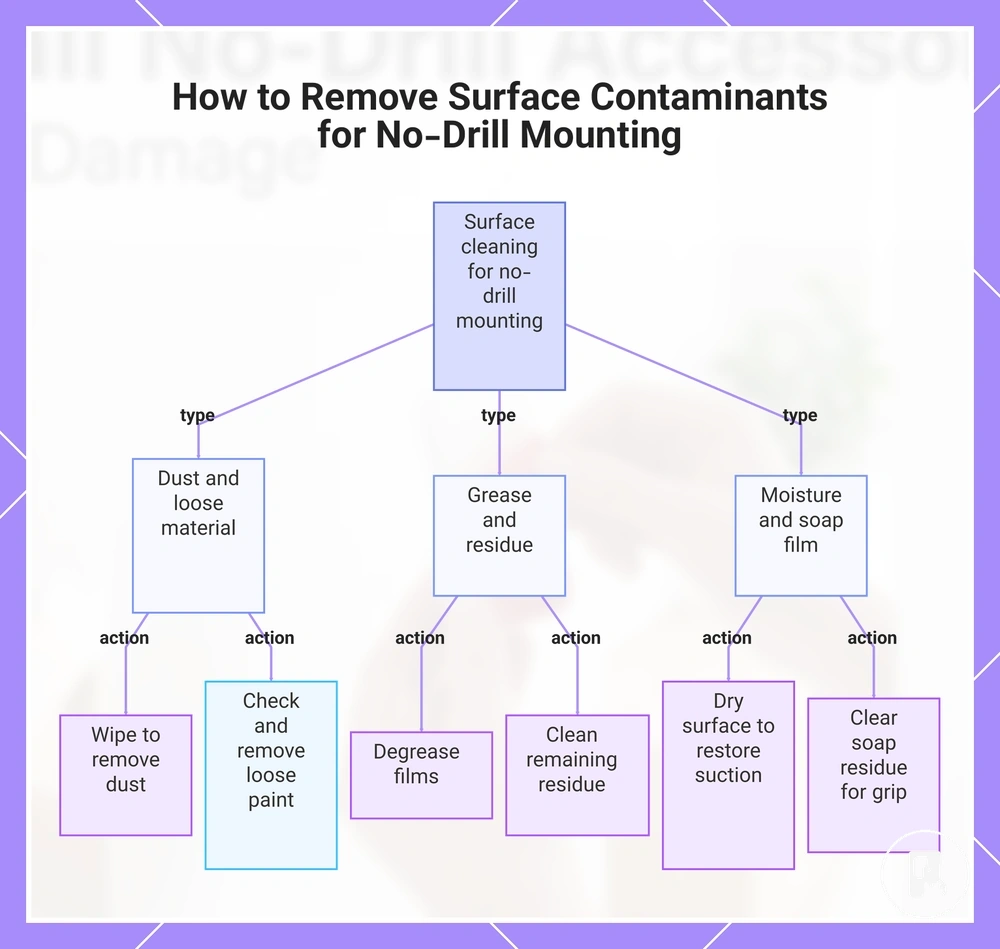
Remove dust, grease, moisture, and loose surface material
Dust, grease, moisture, soap film, loose paint, and residue reduce clean contact between the mounting area and no-drill accessories. These contaminants weaken adhesive pads, disrupt suction seals, and prevent stable contact formation, so removal must focus on restoring a clean contact condition before installation proceeds.
Contaminants affect bonding and sealing in different ways. Dust and loose material interfere with surface contact, grease and residue reduce adhesion strength, moisture disrupts suction performance, and soap film or unstable paint layers can compromise surface stability. Addressing each condition locally helps maintain reliable mounting behavior without over-processing the surface.
- Dust: Wipe the surface to remove dust, as it blocks direct contact and reduces adhesive pad effectiveness.
- Grease: Remove grease films because they weaken adhesion and prevent stable bond formation.
- Soap film: Clear soap residue since it reduces surface grip and affects suction accessory sealing.
- Moisture: Remove dampness and allow drying to restore a dry surface, preventing seal loss and maintaining suction performance.
- Loose paint: Check and remove unstable paint areas as they may detach under removable strip load.
- Residue: Clean remaining residue to ensure consistent contact across the mounting area.
In residue-prone or moisture-prone surfaces, the cleaning process may require additional caution to avoid damaging finishes or reducing surface stability further, especially when preparing for adhesive or suction-based mounting.
This chart shows the main types of surface contaminants that affect no-drill mounting and the specific cleaning actions for each.
Mark the position before adhesive or suction contact
Marking the position before adhesive or suction contact ensures the accessory is fixed only after the correct alignment, level, and reach are confirmed. Without a proper mark position, the contact area may shift during application, which can create uneven load direction, stress on adhesive contact, or instability in suction contact. Position confirmation must happen before any firm attachment to avoid misalignment at the point of bonding.
- Measure the mounting area to confirm the intended contact area, ensuring the accessory reach matches the usable space and prevents strain during use.
- Check level to maintain straight alignment so adhesive contact or suction contact distributes load evenly across the surface.
- Verify clearance around the mounting point to ensure safe reach and prevent obstruction that could affect installation stability.
- Confirm alignment by comparing the mark position with the intended mounting point before any surface contact occurs.
Incorrect mark position may result in crooked loading or uneven stress, which can increase removal risk for adhesive or suction-based mounting systems, especially when the surface finish does not allow easy repositioning.
This chart shows the essential checks before adhesive or suction contact and the risks of skipping proper marking.

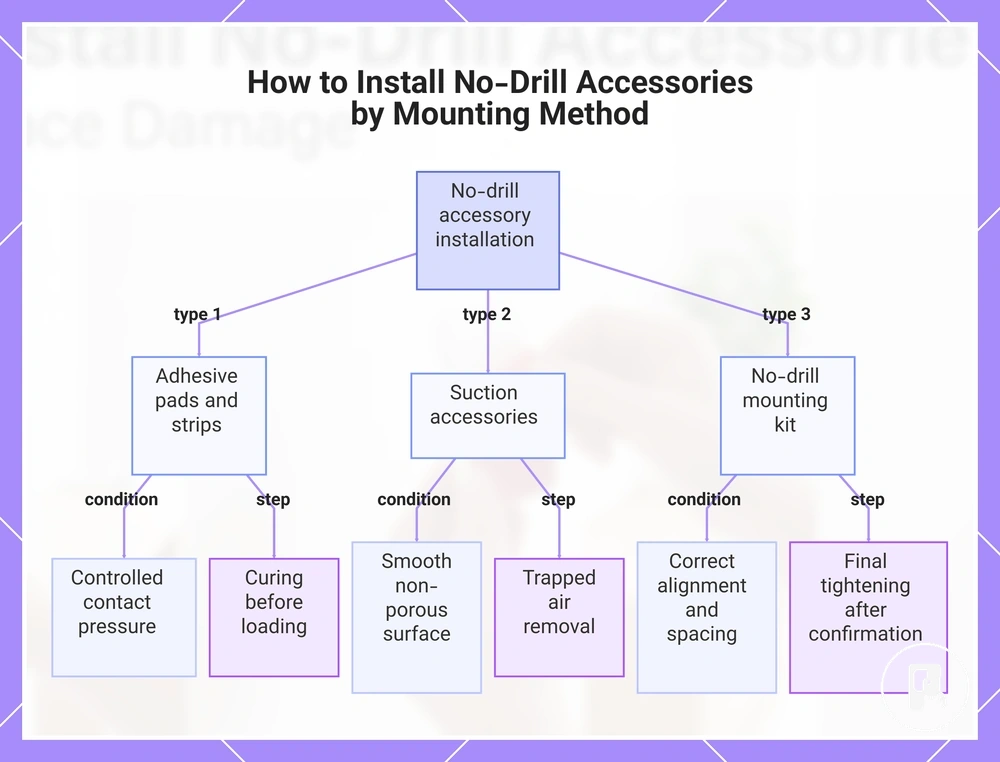
Install the accessory by mounting method
Installation of a no-drill accessory must follow the selected mounting method because each approach depends on different contact pressure, seal formation, and curing behavior. Adhesive pads, removable strips, suction accessories, and a no-drill mounting kit each behave differently during application, so the installation flow changes according to the mounting path instead of using a single universal process.
Adhesive pads and removable strips require controlled contact pressure to ensure the bonding area sits evenly on the surface. The accessory should be aligned first, then pressed uniformly so the contact area stabilizes without shifting. Removable strips also depend on correct positioning before pressure is applied, since early misalignment can affect later removal behavior. Curing may be required depending on rated use conditions, and load should only be applied after the bond stabilizes.
Suction accessories rely on a smooth, non-porous surface to form a stable seal. The accessory must be positioned carefully, then pressed to remove trapped air and maintain suction contact across the full surface area. Any incomplete seal can reduce stability, so the contact area should remain fully engaged during use.
No-drill mounting kit systems depend on correct hardware alignment and spacing before tightening. Each component must be fitted according to its intended position so load distribution remains balanced under rated use conditions. Improper spacing or misalignment can affect stability, so final tightening should only occur after confirming correct setup. Detailed error patterns are addressed in the next troubleshooting section.
This chart illustrates how the installation process varies for each no-drill mounting method, highlighting key requirements and steps for adhesive pads, suction accessories, and mounting kits.
Apply adhesive pads or removable strips with even pressure
Adhesive pads and removable strips must be applied using even pressure to ensure the contact area seats correctly without twisting or uneven bonding. Even pressure helps the adhesive pads and removable strips form stable edge contact and reduces air gaps that can weaken initial adhesion. Load readiness depends on correct seating rather than force, so alignment and surface contact must remain stable throughout application.
Follow these steps to achieve proper seating and reduce application errors:
- Remove the backing while maintaining alignment to prevent dust or misplacement affecting the contact area bond.
- Position adhesive pads or removable strips carefully before full contact to avoid shifting that disrupts edge contact.
- Apply even pressure across the full surface to prevent uneven bonding or weak adhesion zones.
- Press from center toward edges to stabilize the seated surface and reduce air gaps that affect adhesion strength.
- Keep the pull tab accessible on removable strips to avoid stress during later removal and reduce residue risk on the surface.
- Avoid early load application so load readiness is achieved only after proper seating under rated conditions.
Attach suction accessories on smooth non-porous surfaces
Suction accessories require a smooth non-porous surface and an undistorted cup seal to maintain stable attachment. Smooth surfaces such as glass or sealed tile allow the suction cup to form dry contact without air gaps, while porous or textured areas can break the seal and reduce holding stability. The cup seal depends on uninterrupted surface contact, so alignment and seal integrity must be maintained throughout installation.
Follow these steps to ensure a stable suction mount and reliable seal check:
- Clean the smooth surface to remove dust or residue, preventing air gap formation that can weaken suction accessories.
- Verify the surface is non-porous and free from texture, ensuring the cup seal can form without distortion.
- Position suction accessories carefully before pressing to maintain alignment and avoid uneven seal formation.
- Press the suction cup to create dry contact and expel trapped air that may disrupt the seal.
- Perform a seal check after installation to confirm no edge lifting or air leakage in the cup seal.
In environments with humidity or light moisture, repeat seal checks may be necessary because a thin water film can influence how the cup seal stabilizes over time.
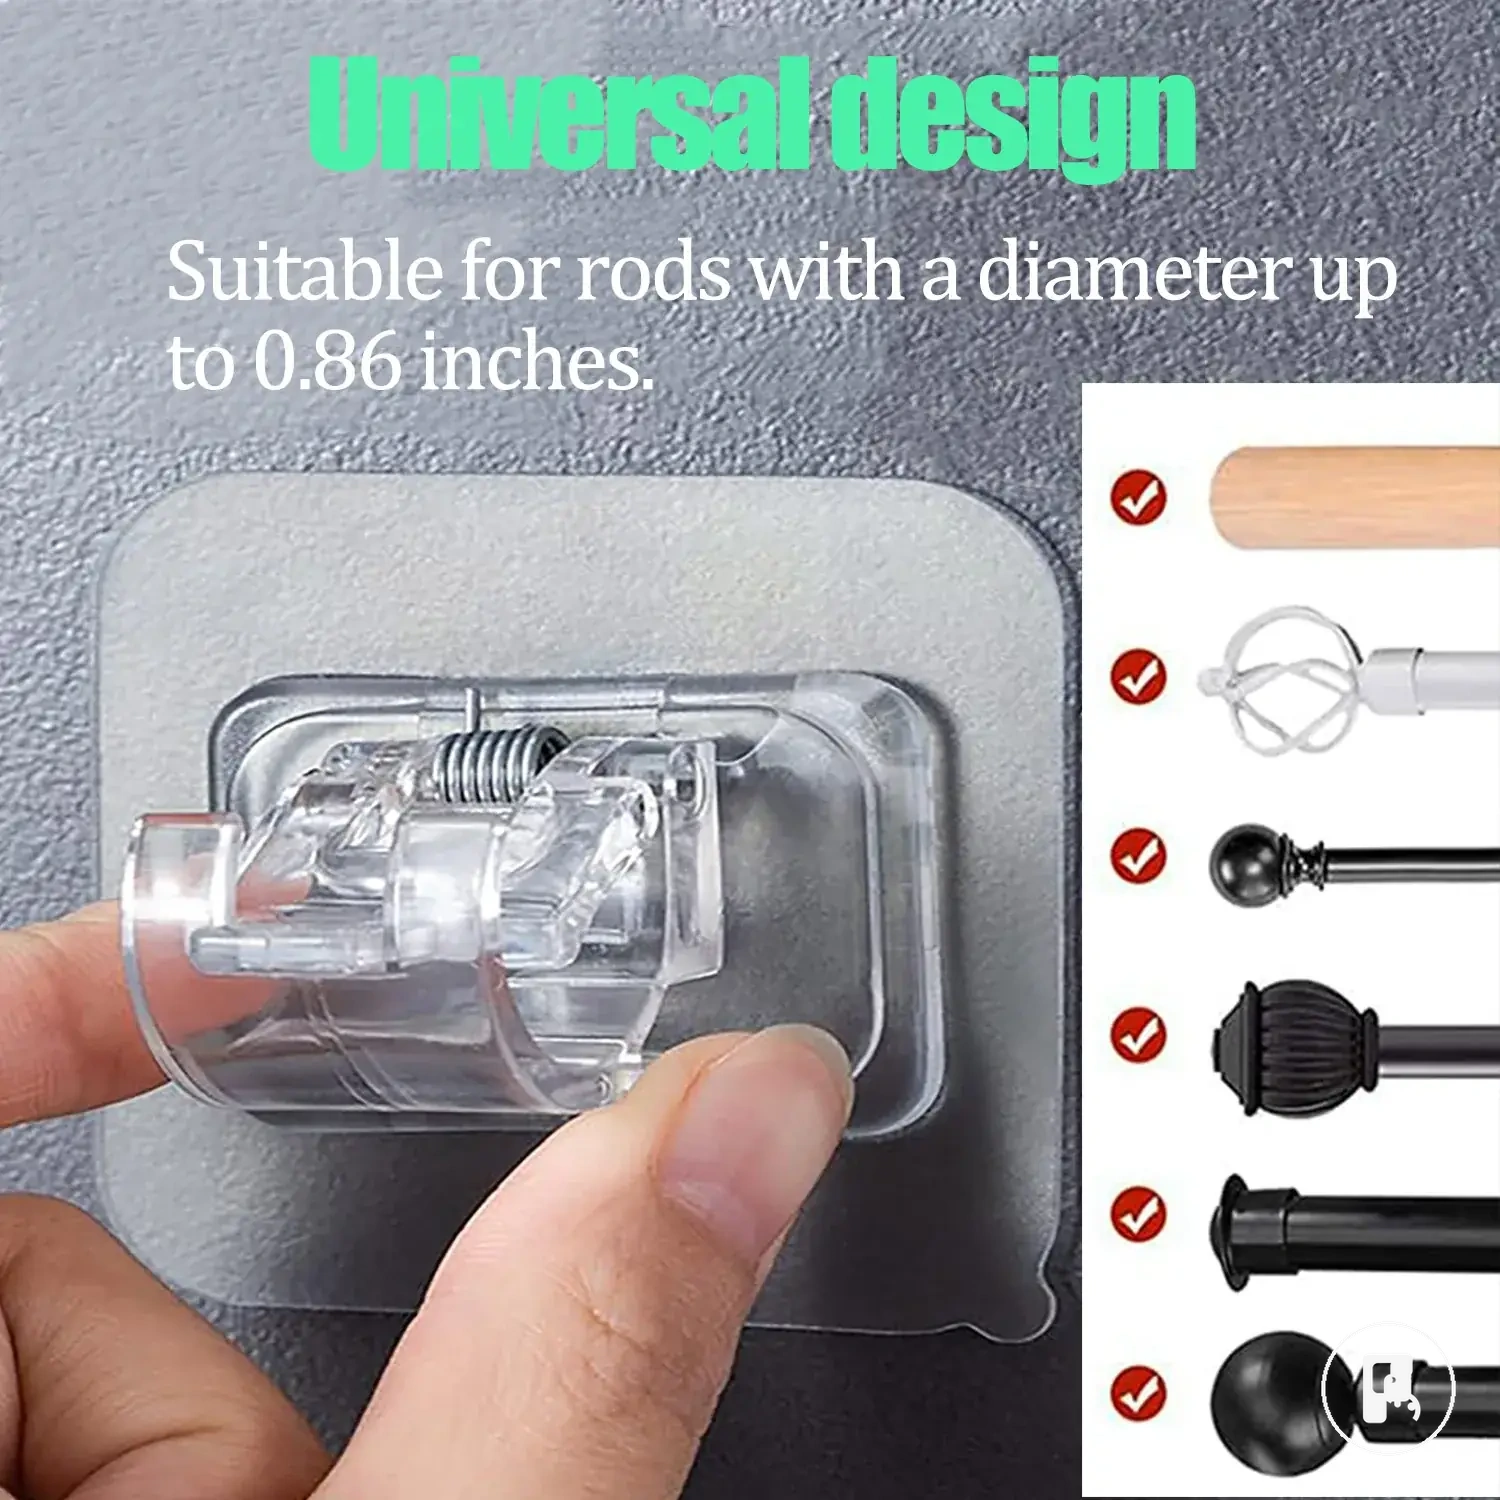
Use no-drill mounting kit hardware only within its rated use
No-drill mounting kit hardware must be used within its rated use because bracket, pad, clamp, and adapter components are designed to work under defined limits. When kit hardware is used beyond its rated use, stability can reduce even if the installation initially appears secure. Performance depends on correct component behavior, spacing, and fixture weight alignment rather than treating the system as universally expandable.
Caution: Exceeding rated use can increase instability risk, especially for heavier or high-impact fixtures that require stricter suitability checks.
Check the following conditions to stay within rated use and maintain controlled installation behavior:
- Bracket positioning aligned with mounting surface to support stable load distribution
- Pad contact consistency to maintain proper grip within rated use conditions
- Clamp engagement checked to avoid overstress beyond intended hardware limits
- Adapter fit confirmed to ensure correct connection between kit components
- Spacing between kit parts maintained to reduce uneven load concentration
- Mounting surface suitability verified to support intended kit hardware behavior
- Fixture weight controlled to remain within rated use limits of the system
Let the mount cure before adding regular load
Mounting readiness depends on cure time, adhesive type, surface condition, room temperature, humidity, and manufacturer guidance. The wait time before adding regular load is not fixed because bond formation and seal stabilization vary across adhesive pads, removable strips, suction accessories, and kit hardware.
Initial grip appears soon after installation, but full bond strength develops later as curing progresses. This means early contact stability does not always represent final load readiness, especially under varying room temperature and humidity conditions that affect bond formation speed.
Before moving to regular use, it is important to distinguish early stability from full readiness. The table below summarizes how different mount types progress from initial grip to full load readiness under typical conditions.
| Mount type | What is ready first | What to wait for | Safe wording |
|---|---|---|---|
| Adhesive pads | Initial grip after application | Cure time and full bond strength | Use light load until fully cured |
| Removable strips | Early surface hold | Adhesive stabilization on surface | Gradual loading recommended |
| Suction accessories | Immediate cup seal | Seal settling under room conditions | Recheck before full load |
| Kit hardware | Initial alignment stability | Load stabilization through spacing and fixture weight balance | Confirm setup before regular use |
Light load testing can be introduced after initial grip, but full load should only be applied once cure time and full bond strength or seal stabilization are complete. Room temperature and humidity can influence wait time, so load progression should remain gradual and aligned with manufacturer guidance rather than immediate full use.
Initial grip versus full adhesive bond strength
Initial grip is the first stick created by contact pressure between the surface and adhesive, while full adhesive bond strength develops later after adhesive flow and the cure window progresses. The two stages are different because early contact does not represent final load readiness and can vary based on adhesive type, pressure, surface condition, and room temperature.
Contrast between initial grip and full adhesive bond strength:
| Aspect | Initial grip | Full adhesive bond strength |
|---|---|---|
| Meaning | First contact created by pressure and surface touch | Final usable strength after adhesive flow and cure window |
| What it allows | Temporary hold and positioning | Stable load readiness for regular use |
| What it does not prove | Does not confirm full bond strength | Does not indicate immediate readiness at installation time |
| Risk factor | Early loading may exceed first stick stability | Still depends on full adhesive flow completion and cure window |
A mount can feel secure during initial grip, but still not be ready for regular load until full adhesive bond strength develops, as early loading can increase risk of edge lift or bond failure when pressure distribution and adhesive flow are not fully stabilized.
Light testing before daily use
Light testing before daily use is a gentle check applied after installation to confirm stability and detect weak contact before normal loading begins. It focuses on early movement signals so potential issues are identified before the accessory enters daily use, without applying stress tests or force beyond intended conditions.
Use light testing as a controlled observation stage and follow stopping criteria immediately if instability appears:
- Visual alignment: If the accessory shifts or appears misaligned, adjust positioning before daily use.
- Edge lift: If any edge begins to lift, stop and recheck surface contact before continuing.
- Wobble: If wobble or movement is detected, stop use and reduce load or refit the accessory.
- Suction release: If suction weakens or partially releases, stop and reseal before daily use.
- Gradual loading: If stable, proceed with only light incremental load before full daily use.
- Stopping criteria: If any instability, shift, or detachment appears, stop immediately and reassess installation.
A passed light testing check does not guarantee long-term stability, as delayed movement can occasionally appear after initial use depending on surface and load conditions.
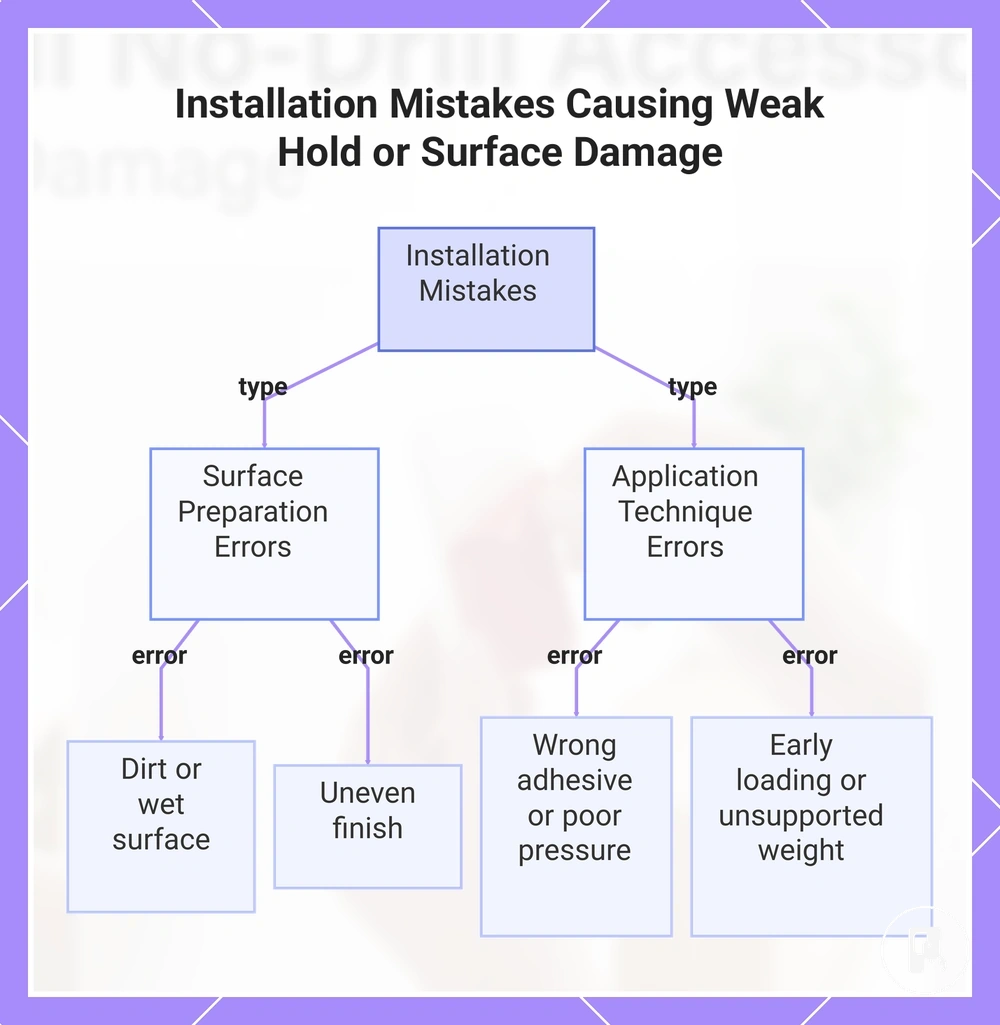
Installation mistakes that weaken hold or damage surfaces
Installation mistakes are the primary cause of weak hold, early failure, or surface damage in no-drill mounting systems. These installation mistakes usually come from poor surface preparation, incorrect adhesive selection, uneven application pressure, or applying load too early before the bond stabilizes, which can lead to weak hold or visible surface damage.
Surface-related installation mistakes often begin with a dirty surface, uneven finish, or wet area. A dirty surface blocks proper contact and reduces bonding efficiency, while an uneven finish prevents full adhesion or suction sealing. A wet area can interfere with bonding or create unstable contact points, increasing the risk of weak hold or partial detachment during use.
Other installation mistakes involve wrong adhesive choice, poor pressure during application, early loading, and unsupported weight. A wrong adhesive may not match the surface type, while poor pressure can leave air gaps that weaken the bond. Early loading before stabilization increases failure risk, and unsupported weight can exceed the system’s safe contact limits, leading to falling accessories or surface damage in real use conditions.
prevent installation failures by recognizing how installation mistakes connect to weak hold conditions and addressing mounting error patterns before they develop into repeated failure behavior.
These installation mistakes are separate from removal-related risks, which depend on how the accessory is detached after use. To reduce surface damage during disassembly, it is important to remove no-drill accessories safely using controlled and gradual techniques rather than force-based removal methods.
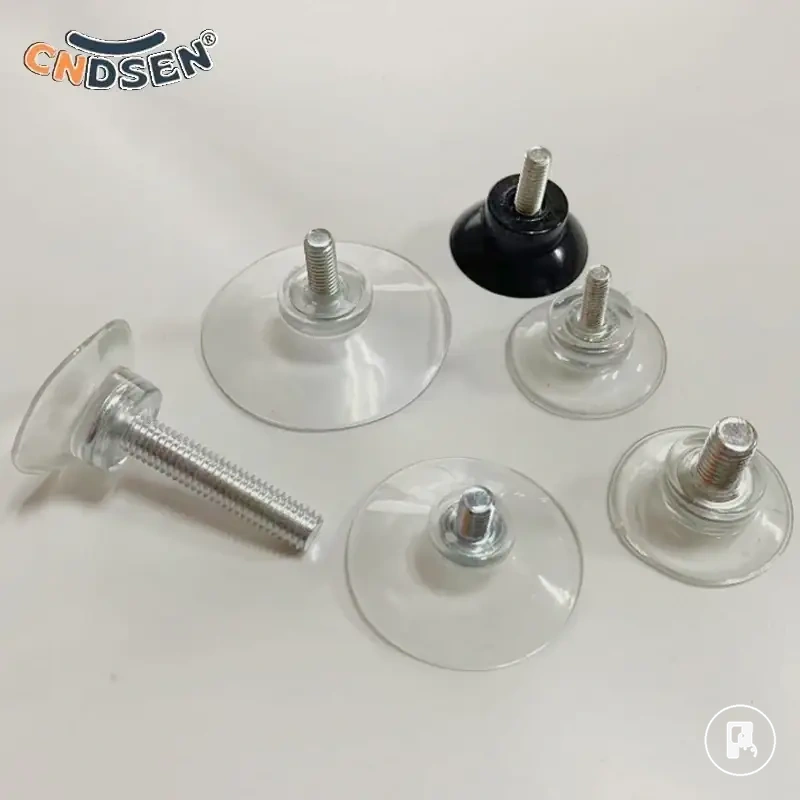
The products below are useful examples for comparing available options. Before buying, check that the compatibility criteria, key features, and product details match your needs.

This chart identifies the main installation mistake categories and specific errors that lead to weak hold or surface damage in no-drill mounting systems.
Dirty, uneven, wet, or unsuitable mounting areas
Dirty, uneven, wet, or unsuitable mounting areas create installation errors by blocking stable contact between adhesive pads, suction systems, or kit hardware and the surface. These conditions often lead to hold failure or early instability because the contact area cannot form evenly under contaminated or structurally inconsistent surfaces.
A dirty surface, uneven surface, wet area, or unsuitable mounting area can each interrupt how the system anchors during installation. Dirt and grease reduce contact efficiency, while moisture can weaken bonding or suction stability. Uneven finishes or porous finishes may prevent full surface engagement, and even locations that appear acceptable can still behave as unstable when hidden residue or surface weakness is present.
- Dirty surface: May reduce contact quality and lead to weak hold; safer response is to avoid mounting until the surface is stable.
- Grease: Can block adhesion and increase weak bond risk; avoid use on contaminated areas where grip cannot form reliably.
- Moisture: May interfere with bonding or suction seal and contribute to hold failure; avoid wet area conditions or stabilize first.
- Uneven surface: Can disrupt contact balance and suction performance; may increase instability and require repositioning.
- Loose paint: May detach under load and create surface damage risk; installation should be avoided on unstable finishes.
- Porous finish: Can allow air leakage or weak adhesion; often unsuitable for suction or adhesive systems.
- Unsuitable mounting area: May combine multiple risk factors leading to hold failure; reassessment of placement is recommended.
Wrong adhesive choice, poor pressure, and early loading
Wrong adhesive choice, poor pressure, and early loading can break installation stability even on a suitable surface by preventing proper bond formation between adhesive pads, strips, or mounting systems and the contact area. These installation errors often lead to hold failure because material selection, pressure consistency, and timing directly control how the bond develops before load is applied.
When adhesive type, strip size, or pad contact is not aligned with the fixture and surface conditions, the installation may fail to stabilize even if the mounting area is correct. Weak pressure can leave gaps in pad contact that reduce adhesion efficiency, while early loading before the curing period is complete can overload the partially formed bond. Fixture weight also plays a role, as excess load during early stages can disrupt bonding before full stability is reached.
- Wrong adhesive choice: Can reduce compatibility with surface or load needs; safer response is selecting adhesive type based on surface and fixture weight requirements.
- Undersized strip size: May limit pad contact area and reduce stability; ensure strip size supports full coverage of the mounting zone.
- Poor pressure: Weak or uneven pressure can reduce pressure consistency and create air gaps; apply uniform pressure to secure pad contact.
- Early loading: Applying load before curing period completion can interrupt bond formation; wait until curing period is complete before use.
- Fixture weight mismatch: Excess weight can overload partial bonds; ensure load is within safe limits during initial installation phase.
If installation continues to fail even after correcting adhesive type, pressure, and timing, the issue typically moves beyond installation behavior and should be treated as a broader troubleshooting case rather than repeated reinstallation attempts.